Installation
1 – Double click on the installation file. The following windows appears.
2 – Click ‘Next’. The following windows appears.
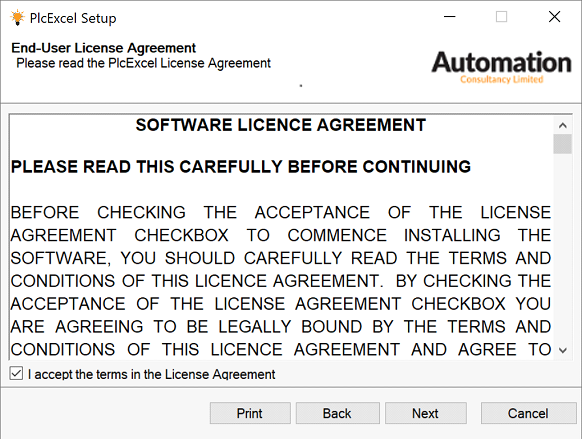
3 – Read the license agreement and if you agree, click ‘Next’. The following windows appears.
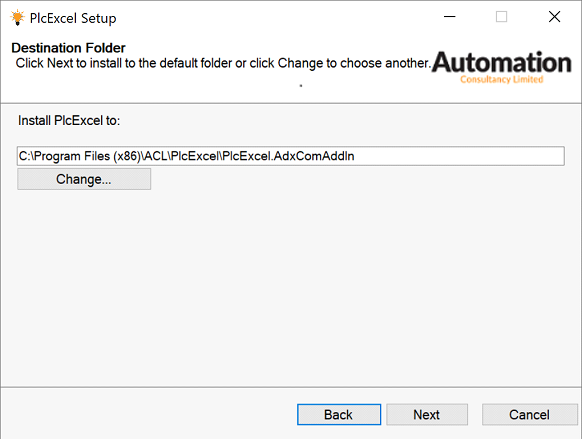
4 – Leave the default installation directory or select a custom one. Click ‘Next’. The following windows appears along with a windows prompt to allow installation to proceed.
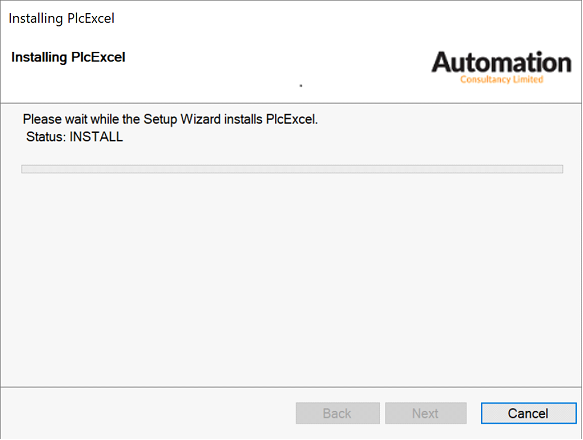
5- if the installation can proceed by Clicking ‘Yes’ on the windows prompt. The following windows appears.
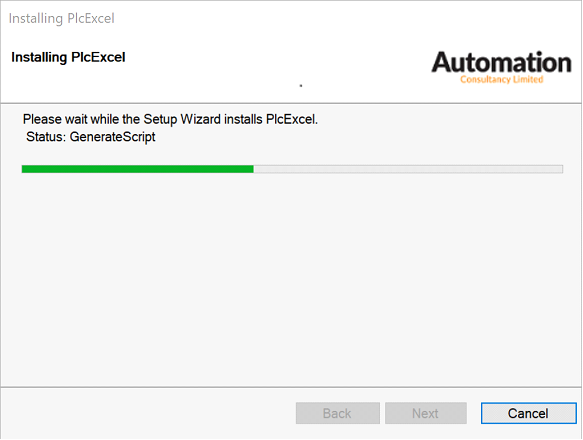
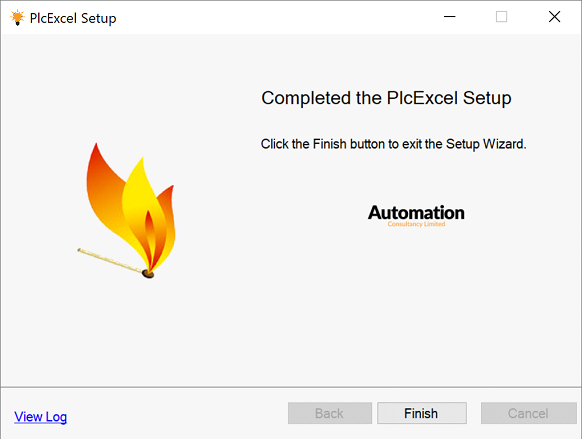
6- When the installation is complete the following windows appears.
7 – Click ‘Finish to complete the installation.
8 – Launch Excel in ADMINISTRATOR mode. The following windows appears.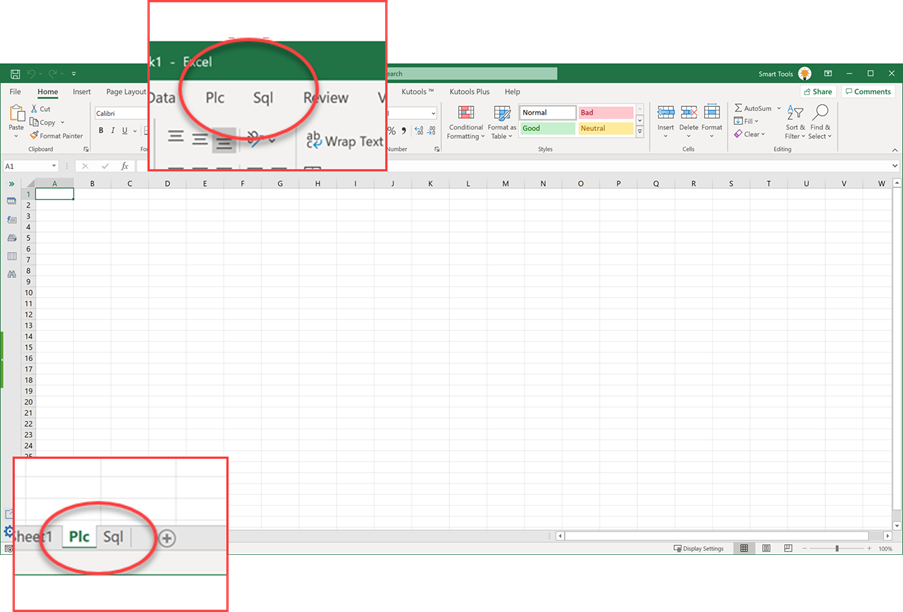
8 – Observe the Plc and Sql Add-ins have been added along with the ‘Plc’ and ‘Sql’ worksheets. This confirms the installation.
9- If the Add-Ins and worksheets do not appear. On the excel spreadsheet select ‘File’. The following window appears.
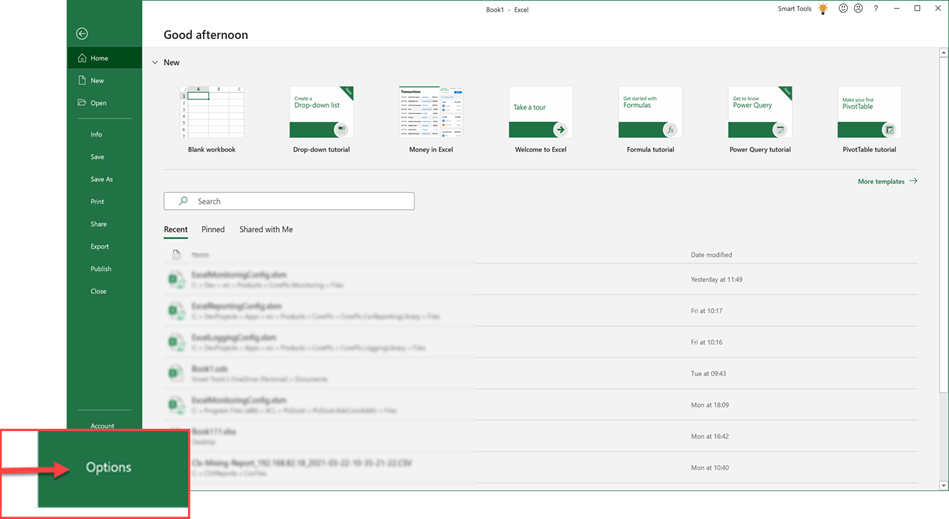
10 – Select ‘Options’. The following window appears.

11 – Select ‘Add-ins’. The following window appears.
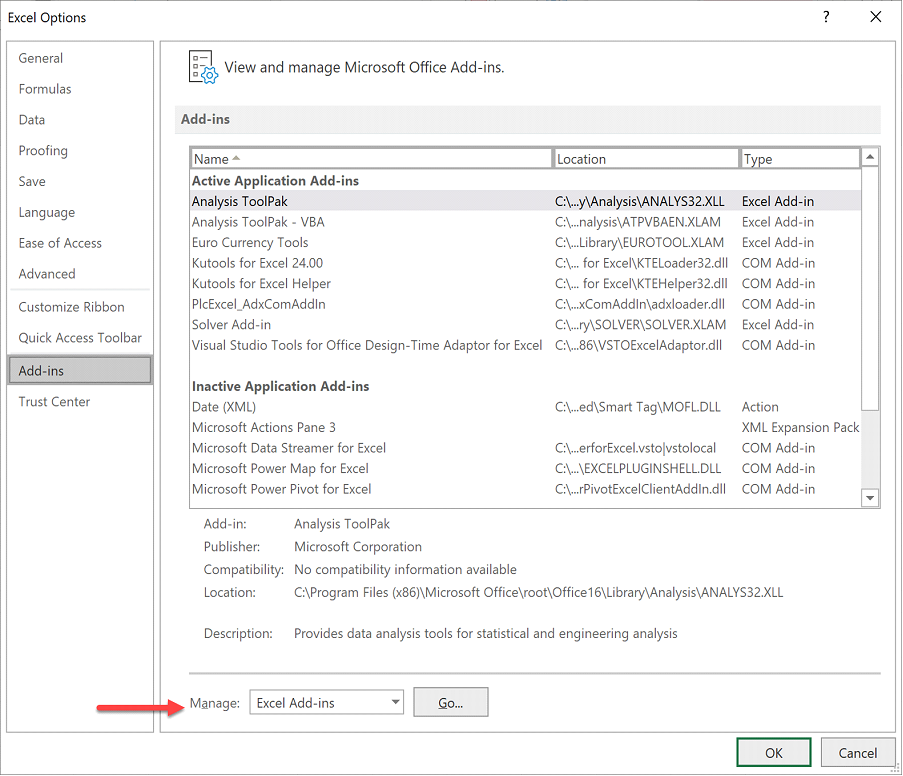
12 – Select Com-Ad-Ins from the drop down.
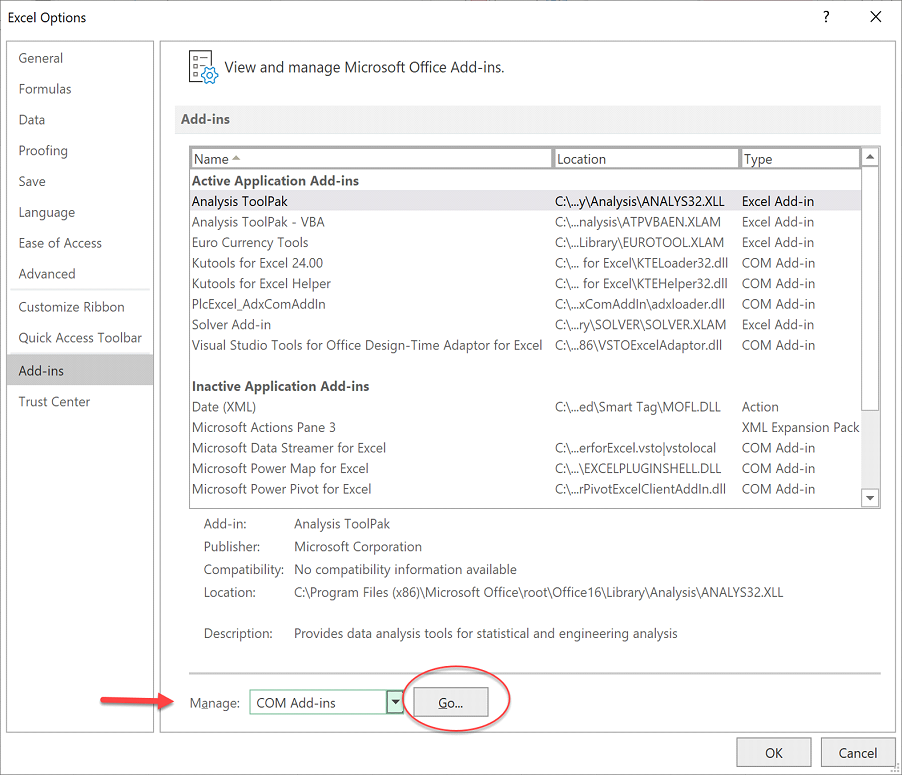
13 – Click on the ‘Go’ button. The following window appears.
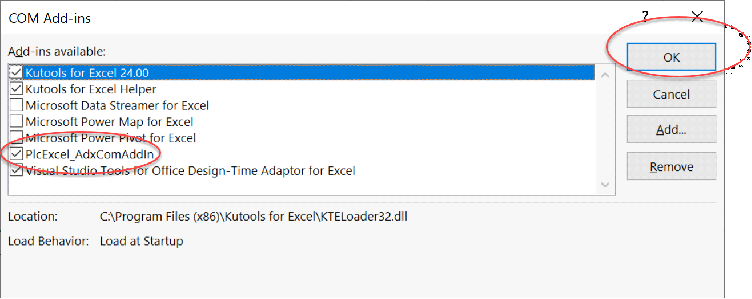
13 – Make sure the ‘PlcExcel_AdxComAddin’ is ticked. Click the ‘OK’ button. Excel should display the ‘Plc’ and ‘Sql’ Add-ins and worksheet.
The installation is complete.